TFB Armorer's Bench: STEN Mk2 Build - Removing Old Receiver Remnants


Welcome everyone to the TFB Armorer's Bench! This series focuses on home armorer and gunsmith activities to help you improve your skills and maintain your firearms. Today, we're diving into what's essentially part 3 of my STEN Mk2 build series. If you missed the earlier installments, part 1 covered cleaning Cosmoline with an ultrasonic cleaner, and part 2 tackled converting 20rd STEN magazines back to 32rd. This time, we're getting into the real meat of the build - removing the old receiver tube remnants from a parts kit.
Note: Before anyone gets too excited about this project, I strongly recommend reading through this entire build series before making any purchases. STEN parts kits aren't the bargain they used to be; semi-auto conversion parts have gotten expensive, and this process requires patience, basic machining know-how, and comfort with power tools. This isn't a step-by-step "how-to" guide - it's how I approached my first STEN build, complete with the learning curve that comes with it.
More Armorer’s Bench Content:
- TFB Armorer's Bench: Using RCBS' Ultrasonic Case Cleaner-2 for Brass
- TFB Armorer's Bench: Cleaning Cosmoline With an Ultrasonic Cleaner
- TFB Armorer's Bench: Remington Sportsman Cleaning Kit Review
- TFB Armorer's Bench: RCBS Ultrasonic Case Cleaner 2 – A Closer Look
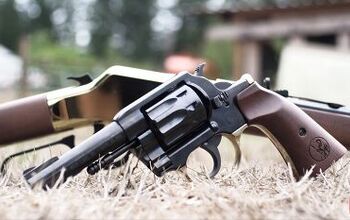
- TFB Armorer's Bench: Mounting an Optic on an X-Frame Revolver
TFB Armorer's Bench: STEN Mk2 Build - Removing Old Receiver Remnants
Here, we at TFB hope to inform, entertain, and even inspire any would-be gunsmith or armorer out there. Ideally, with the information I provide and with the help of our sponsors, you can have some useful knowledge pertaining to the conservation and improvement of firearms technology while at the same time sharing experiences and teaching each other new tips and tricks along the way in the comments. Digging deep into what it is to be an armorer or gunsmith has significance but what is important is what those people do to show they’ve earned that title. I am happy to share my experiences and knowledge and hope it is informative!
Make your personal safety a priority:
- Practice proper gun safety. Always make sure before the firearm hits your bench that it is unloaded and safe to be handled.
- Wear the proper safety equipment. The main one would be safety glasses (decent ones) since parts are often under spring tension and you may work with high RPM tools. Other honorable mentions would be latex gloves or a respirator when working with potentially harmful solvents and oils. Also hearing protection when working with loud machinery or test-firing firearms.
- Modifications, alterations, and customizations will void your firearm’s warranty 9.5 times out of 10. Please take that into consideration before attempting any at-home gunsmithing.
- If you are unsure about proper safety practices, disassembly procedures, or warranty standards, stop, put down the tools, and consult a competent gunsmith.
Why I'm Building a STEN
Full disclosure, I've never built a STEN before this project. I saw a fellow student tackle one back in gunsmith school years ago, but this is my first hands-on experience. The timing isn't great for this kind of project either. Parts kits that used to be dirt cheap are now commanding pretty hefty prices, and the components needed for semi-auto conversions have gotten expensive too. But curiosity got the better of me, especially after finding that most online resources were either incomplete YouTube series (probably taken down due to platform policies) or forum posts where people were troubleshooting problems or showing off successful builds. I saw a sub $400 STEN MK2 kit and jumped on it, knowing it was a hefty price for a box of cosmoline-coated jagged parts.
I do have a book on STEN construction from back when these kits were plentiful and cheap, but it's from an era when you could either legally build machine guns without the current restrictions, or it's meant for dealers. Those days are long gone unless you're a properly licensed SOT dealer.
Understanding the Challenge
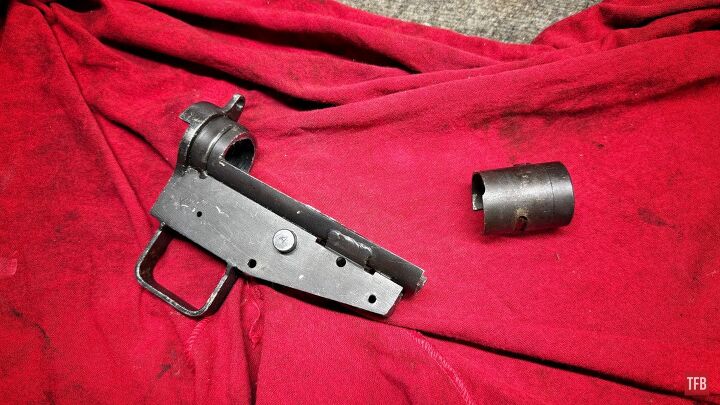
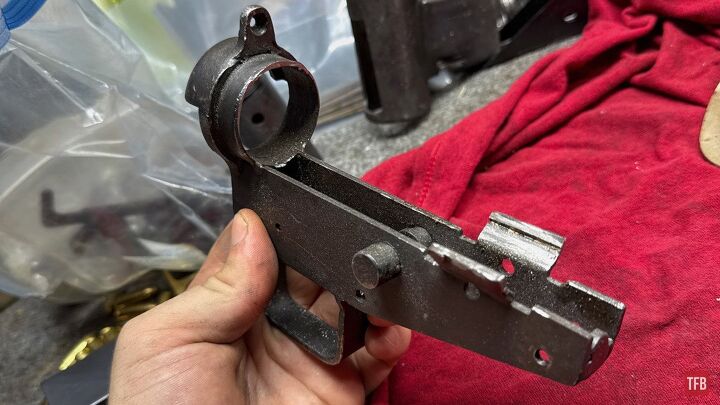
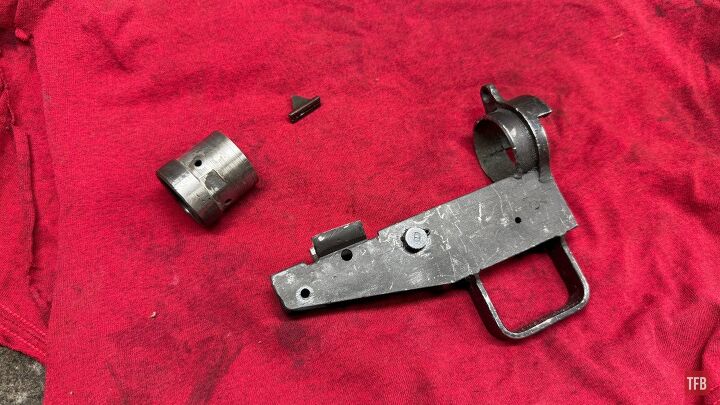
When you get a STEN Mk2 parts kit, you're dealing with a receiver that's been cut up or torched to comply with import regulations. The fire control housing (think "lower receiver" in AR-15 terms, though this isn't actually the serialized firearm part on a STEN) still has chunks of the original receiver tube welded to it in three key locations:
two spots on the side wings of the trigger assembly area and one point up top, just in front of where the rear peep sight is.
These kits come in two flavors: saw-cut or torch-cut as I said. Mine was saw-cut, which creates cleaner lines to work with. The torch-cut versions I've seen in photos look like an absolute mess with melted and distorted metal everywhere. Count yourself lucky if you get a saw-cut kit. For all I know, the torch-cut ones may be easier for some reason. Educate us in the comments!
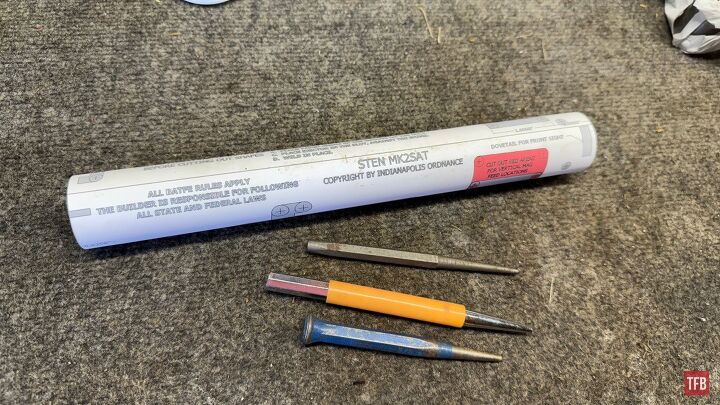
Tools and Approach - Removing Old Receiver Remnants
My weapon of choice for this job was a hacksaw, backed up by a hand grinder with cutting discs for precision work. That’s right! The handy dandy Dremel is making its debut on Armorer’s Bench, much to my chagrin. Get used to it, it's sort of a fitting requirement for this cobbled-together tube gun.
You may also need a solid vise, pliers, a flathead screwdriver, a drill press with various-sized bits, a large brass punch, files, and sandpaper for cleanup.
The core objective is simple: cut out all the old receiver tube material so you can install a new one. Simple in concept, less simple in execution.
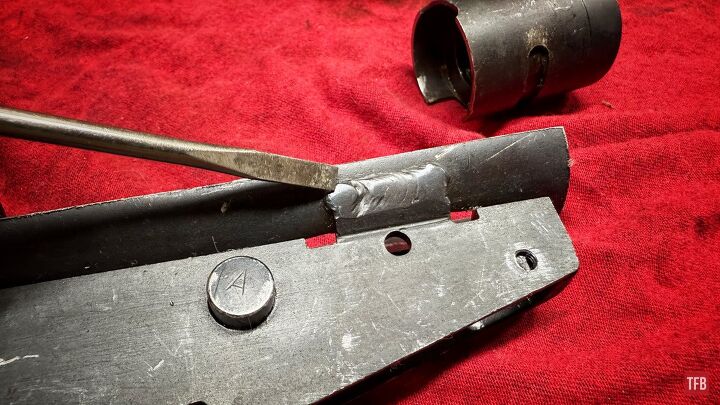
Tackling the Fire Control Housing
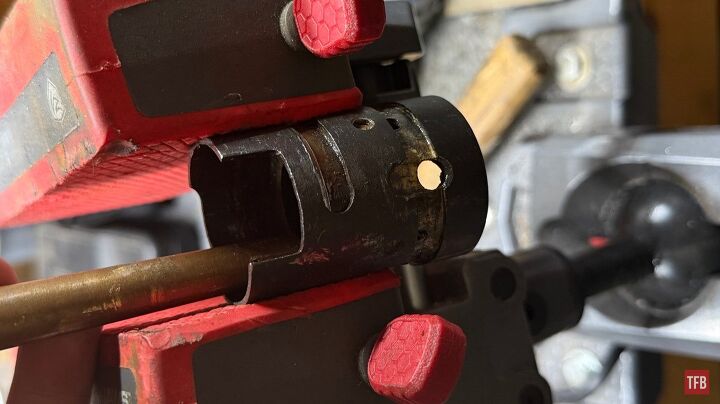
I started by making relief cuts just in front of the welds on those side wings, giving myself room to maneuver. Once I had the front chunk of tube isolated, I could grab it with pliers and work it back and forth until the metal fatigued and snapped off.
Then I cut behind the wings as well, leaving tabs of old receiver material still welded to the wings themselves.
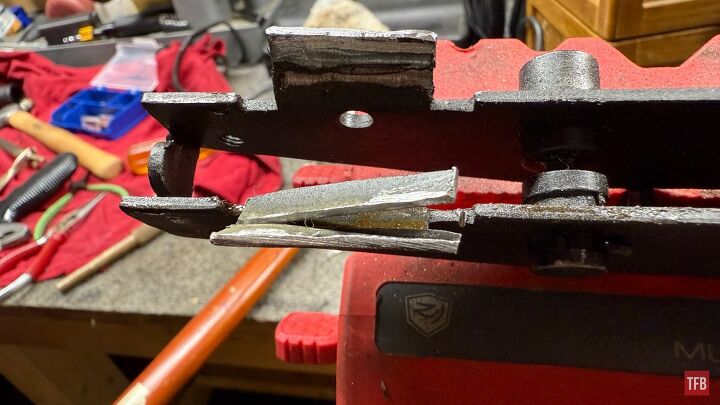
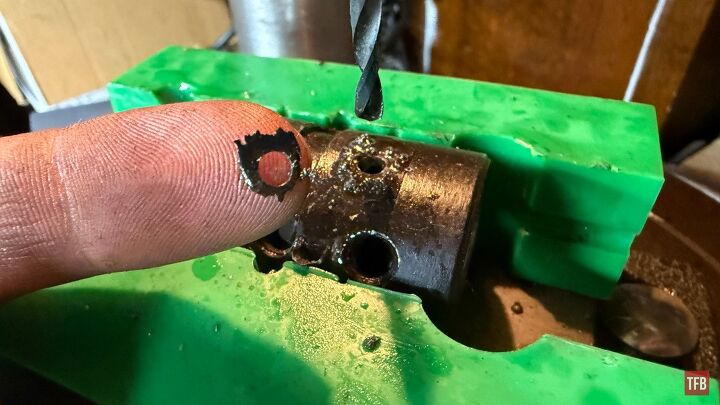
Next came the weld point up front near the rear sight mounting area. A good cut with the grinder until I was completely through, then the real work began.
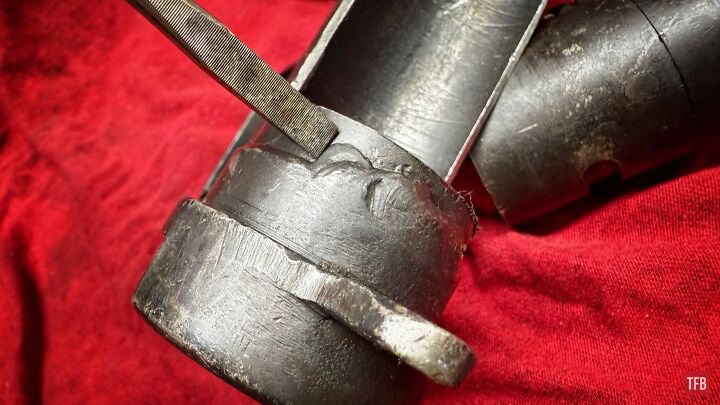
Getting that remaining tube section out required clamping the old tube in my vise and literally squashing it so it wouldn't hold its circular shape anymore. Once deformed, it could be wiggled and pried out of the housing.
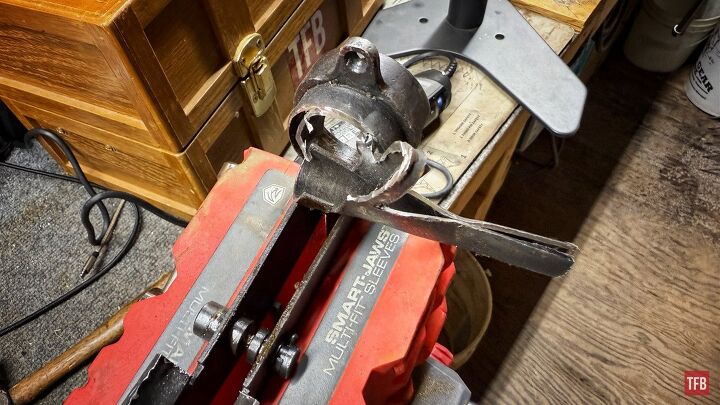
Be careful during this process. There's a small indexing tab inside the remaining ring that the new receiver tube will need to locate against. Mine was positioned at the top, though I've seen photos where it's at the bottom. Don't grind this off.
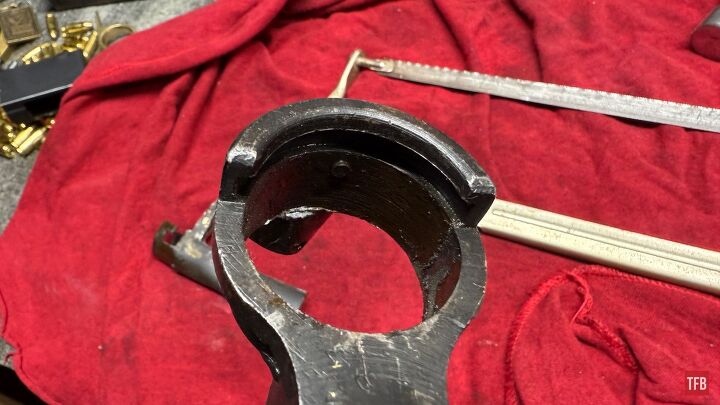
I also got lucky and didn't have internal welds to deal with, but be aware that some kits might have weld material on the inside of that ring that you'll need to remove.
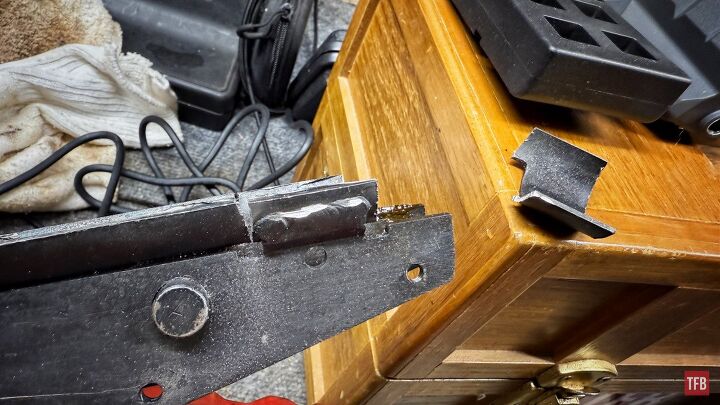
The Tricky Wing Material
The remaining receiver material on those side wings proved to be the trickiest part. I had to shave off enough material to clear the new tube without damaging the original wing structure. This required patience and a light touch with the cutting disc, attacking the inside at about a 45-degree angle to remove as much old receiver as possible.
I wasn't obsessive about getting every last bit. These guns were slapped together quickly during wartime. As long as it functions and looks the part, I'm not worried about machine-shop perfection.
Someone with more ambition could probably cut off the wings entirely and weld on new ones, but I wanted to preserve as much original material as possible. May end up circling back to this once the tube is finished.
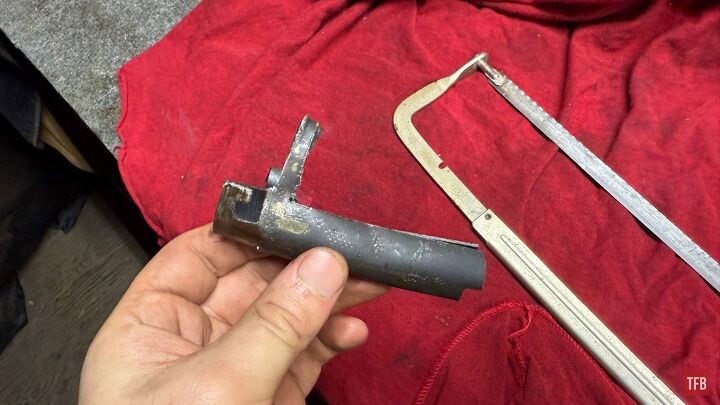
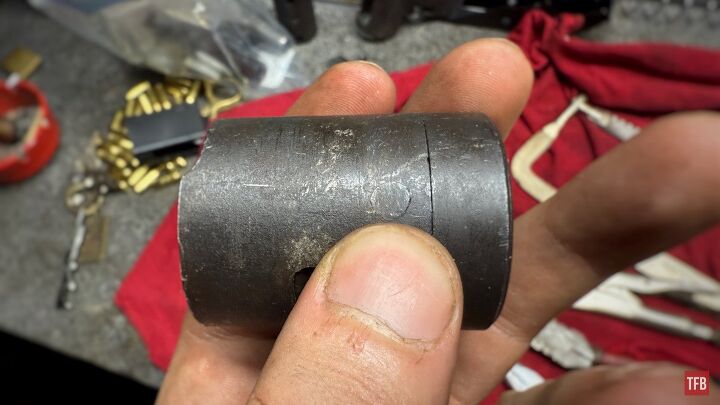
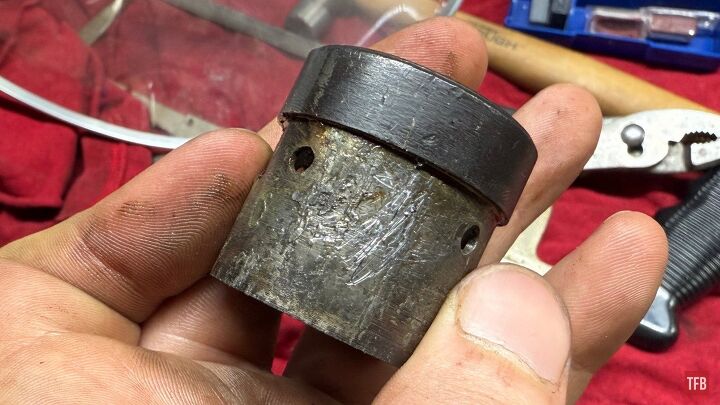
Dealing with the Barrel Nut
The barrel nut assembly presented its own challenge. Mine still had a chunk of old receiver tube attached, and while you can buy new barrel nuts, I wanted to see if I could salvage the original.
The front sight is dovetailed into both the receiver tube and the barrel nut, with a single external weld holding everything together. I ground away the weld on the receiver tube side (being careful not to damage the barrel nut), then hammered out the dovetailed sight. This was easier than expected.
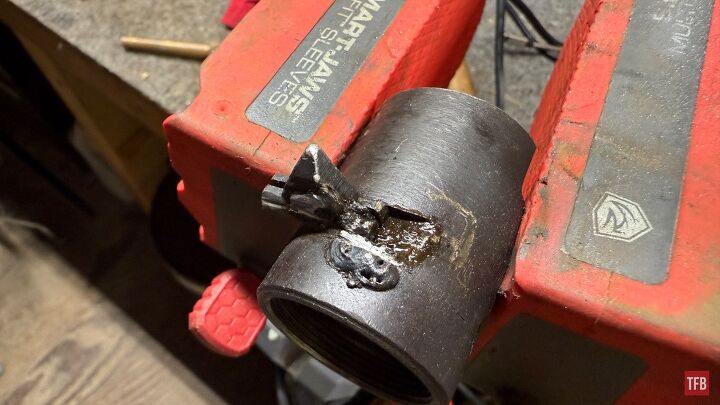
Looking inside the barrel nut, I found four separate weld spots where they'd apparently filled holes that had been drilled through both parts.

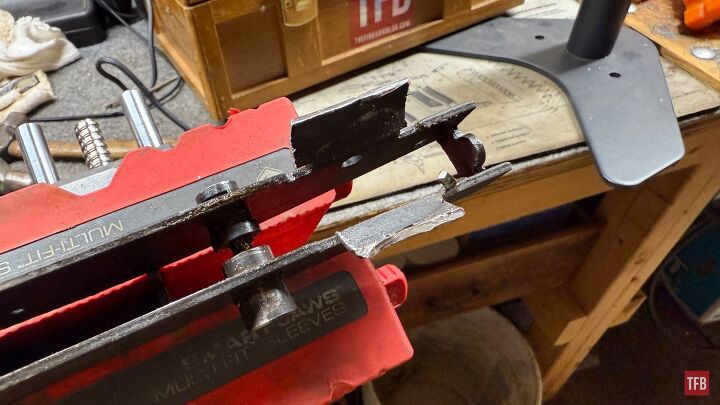
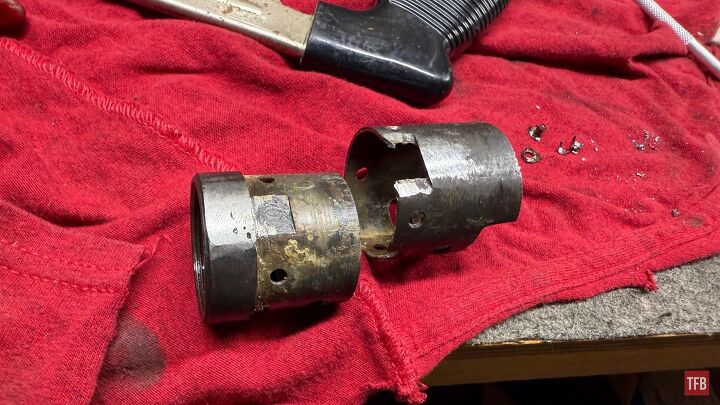
My solution was to drill these out with an undersized bit on the drill press. The drilling action broke the welds loose, and in some cases, the weld material just popped out on its own.
Even with the welds removed, years of corrosion and possibly old welding flux had the parts practically fused together. I clamped the assembly by the old receiver tube and used a large brass punch to drive the barrel nut free. This required finding the sweet spot for vise pressure - too tight and you're working against yourself, too loose and everything bounces around.
Eventually, persistence paid off, and the barrel nut came free. The exterior showed remnants of what looked like old welding flux, which I scraped away with a screwdriver. It has a metallic, soft consistency that makes me wonder if there was some soldering involved in the original assembly.
Lessons Learned
This first phase taught me that patience really is key with this build. There's no rushing the process, and getting aggressive with the tools will just create more problems. A mill sure would be nice, but my humble workshop doesn't have the space or funds for that. It would sure make the next phase a breeze. The goal is to remove the old material without damaging the parts you want to preserve.
I'll admit there were moments when this felt pretty sketchy - you're essentially reverse-engineering an 80-year-old design with limited documentation. But the basic concept is sound: remove old, eventually install new. The devil is in the details and the execution.
Next up in this series, we'll tackle roughing through a new receiver tube. If you're following along with your own build, take your time with this phase. A little extra care here will save headaches later in the process. Let me know if you have any tips and tricks along the way. Fellow STEN builders, make yourself heard!
As always, thank you for reading TFB! Be safe out there, have fun while shooting, and we will see you next time for the TFB Armorer's Bench! Also, let us know what you think in the comments below! We always appreciate your feedback.
Staff Writer: TheFirearmBlog & AllOutdoor.com | Certified Gunsmith | Published Author | Firearm History Enthusiast
More by Sam.S


Comments
Join the conversation
One technical clarification is needed regarding who can construct and who can possess a post-May 1986 machine gun. Only a class 2 manufacturer can construct them. A class 3 dealer is allowed to acquire and possess them if a federal, state, or local government agency makes a formal legitimate request for a demonstration. Only the specific firearms listed in the letter can be acquired and these are subject to ATF review and approval.
Kits to reproduce/install the -now- missing parts, and specific certain parts that produce a semi-auto -only (totally legal) version of the demilled sub-gun are how these kit guns are -generally- re-crafted.