

TFB Armorer's Bench: Cleaning Cosmoline With an Ultrasonic Cleaner


Welcome everyone to the TFB Armorer's Bench! I recently spotted a Sten Mk2 kit for a decent price and couldn't resist picking it up. These kits used to be available for a couple hundred bucks, but lately they've shot up in price as they've become less and less common. People buy these because they're simple to bring back to life in semi-auto form with some new parts and a little know-how. It seemed like a fun project. Mine arrived soaked in thick cosmoline in a plastic bag, which turned out to be the perfect test case for the RCBS Ultrasonic Cleaner 2.
More TFB Armorer's Bench:
- TFB Armorer's Bench: RCBS Ultrasonic Case Cleaner 2 – A Closer Look
- TFB Armorer's Bench: Mounting an Optic on an X-Frame Revolver
- TFB Armorer's Bench: Diagnosing and Assessing a Winchester 94
- TFB Armorer's Bench: Diagnosing and Assessing a Colt 1877 Lightning
- TFB Armorer's Bench: By The Armorer Book – M1 Garand Maintenance
- TFB Armorer's Bench: How I Make Dummy Rounds
TFB Armorer's Bench: Cleaning Cosmoline With an Ultrasonic Cleaner
Here, we at TFB hope to inform, entertain, and even inspire any would-be gunsmith or armorer out there. Ideally, with the information I provide and with the help of our sponsors, you can have some useful knowledge pertaining to the conservation and improvement of firearms technology while at the same time sharing experiences and teaching each other new tips and tricks along the way in the comments. Digging deep into what it is to be an armorer or gunsmith has significance but what is important is what those people do to show they’ve earned that title. I am happy to share my experiences and knowledge and hope it is informative!
Make your personal safety a priority:
- Practice proper gun safety. Always make sure before the firearm hits your bench that it is unloaded and safe to be handled.
- Wear the proper safety equipment. The main one would be safety glasses (decent ones) since parts are often under spring tension and you may work with high RPM tools. Other honorable mentions would be latex gloves or a respirator when working with potentially harmful solvents and oils. Also hearing protection when working with loud machinery or test-firing firearms.
- Modifications, alterations, and customizations will void your firearm’s warranty 9.5 times out of 10. Please take that into consideration before attempting any at-home gunsmithing.
- If you are unsure about proper safety practices, disassembly procedures, or warranty standards, stop, put down the tools, and consult a competent gunsmith.
Quick Background: Cosmoline and Ultrasonic Cleaning
If you've never dealt with cosmoline, you're ahead of the game. This thick, waxy preservative shows up on old military surplus guns and parts kits. Sure, it keeps metal from rusting for decades, but removing it sucks. You end up fighting with harsh solvents and scrubbing until your arms hurt.

Ultrasonic cleaning won't solve all your problems. It's not replacing the brush in your hand. What it does is handle the heavy lifting before you start scrubbing. The cleaner uses high-frequency vibration to shake up the cleaning solution. This shakes down gunk and gets into spots you can't reach. You still need to clean and wipe everything down after, but the ultrasonic action makes that final step way easier.

Why This Test Made Sense
I wanted to see three things with this project. First, I wanted to find out if an ultrasonic cleaner was actually capable of removing cosmoline, or if it would still be a by-hand-plus-heavy-chemicals situation. Second, I was curious how the cleaning solution would hold up to this kind of abuse and whether it would still be usable for future projects. Third, I wanted to see if the RCBS system could handle this kind of challenging job while gaining more experience with the unit.

This fits into my broader plan to test the RCBS cleaner on various applications – I'm planning to do more generic cleaning with it, suppressor cleaning, and brass cleaning in time. But cosmoline removal seemed like a good stress test to start with, especially since it would let me avoid exposing my hands and lungs to harsh solvents if it worked well.
The Setup Process
I used the RCBS Weapons Cleaning Solution diluted with water at the recommended 40:1 ratio. The plan was to set the temperature as high as the unit would go – that's 60°C or 140°F – and run 30-minute cycles. I figured the cleaner would do all it could accomplish in that timeframe between manual scrub sessions.

Before putting anything in the cleaner, I removed the thickest deposits and layers of cosmoline with rags. This wasn't about getting parts clean, just about giving the ultrasonic cleaner a fighting chance by removing the heaviest buildup. No point in overwhelming the system right from the start.

Cleaning Process
The process became a cycle: remove the worst cosmoline by hand, put parts in the cleaner for 30 minutes, then wipe everything down when the cycle finished. Most parts only needed one round, but the bigger components with hard-to-reach areas still had gunk after the first run. Those got broken down further and tossed back in for another cycle.

What was interesting to watch was seeing globs of cosmoline "bloop" to the surface during the cleaning cycles. The ultrasonic action was definitely doing something – it was getting at deposits I couldn't reach manually and prepping surfaces for a much easier wipe-down. Parts that came out of the cleaner wiped clean and dry with minimal effort.

The major issue I ran into was heating time. The unit takes a very, very long time to heat up to any meaningful temperature. I'm talking an hour or more, and it never actually reached its maximum temperature before I ran low on time and had to proceed anyway. You're much better off dumping in hot water and mixing your solution each time, though this sucks if you don't want to waste solution from a previous run – you're stuck with cold or room-temp solution that needs heating time.
Results and Observations
Compared to traditional cosmoline removal methods I've used in the past, this was already winning just by avoiding harsh solvents. I usually resorted to aggressive chemicals when I was in a rush, but if I didn't have to expose my hands and lungs to that stuff, the ultrasonic method had a major advantage right there.
The cleaner surprisingly got at deposits I couldn't reach manually. The cavitation action worked its way into tight spots and complex geometries that would have required disassembly to clean properly by hand. Parts came out looking significantly better than when they went in, and the final wipe-down was much easier than expected.

The main struggle wasn't with specific parts, though some components didn't fit well in the tank; that's not the system's fault. The real issue was the heating situation I mentioned. An hour-plus heating time that never actually reaches maximum temperature is problematic for any serious cleaning project.

Cleanup was actually pleasant thanks to the drain spout. Being able to wipe down the inside of the tank and easily empty the solution was convenient. I ran the drain hose through a piece of thick cloth to see how dirty the solution would get, and I was surprised – it wasn't that bad. This told me the cosmoline had more or less dissolved into the warm solution rather than just floating around as chunks. Since it would likely redeposit later in some form, I decided to throw the solution out rather than try to reuse it.
Practical Takeaways
I'd definitely recommend this method to others dealing with cosmoline, especially as an alternative to harsh chemicals. The process is much more pleasant than traditional solvent-based removal, and the results are genuinely good. However, there are limitations – mainly the vessel size and the heating time issues.

The big lessons learned: be prepared to lose your cleaning solution after a cosmoline job, and plan to preheat about 70 years ahead of time if you want the system to actually reach operating temperature. Starting with hot water and mixing a fresh solution each time is probably the most practical approach.

As for my overall impression of the RCBS system, it's proving to be capable equipment. I love the drain setup and the solution measurement features. I'm not a fan of the buttons that use only symbols rather than words – I have to memorize what each one does or consult the manual. The unit is noisy, like every ultrasonic I've used, which is expected. My biggest wish is that the actual tank was bigger, since the overall system is seemingly giant, but the usable space feels limited.
Conclusion: Cleaning Cosmoline With an Ultrasonic Cleaner
Cleaning cosmoline with an ultrasonic cleaner turned out to be a viable alternative to traditional harsh chemical methods. The RCBS Ultrasonic Cleaner 2 handled the job well, though it revealed some limitations in heating time and tank capacity. For anyone dealing with cosmoline-soaked surplus parts, this approach offers a much more pleasant working environment while delivering solid results.

The process isn't perfect – you'll still need to do some manual prep work and deal with heating delays – but it's a significant improvement over sitting in a cloud of solvent fumes while scrubbing by hand. I'm excited to see how the system handles other specific cleaning jobs as I continue testing it on different applications.

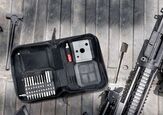
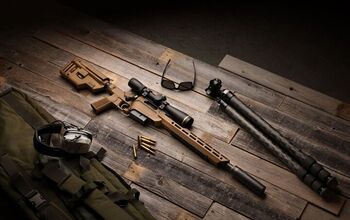
Here's some additional photos from the cleaning process:


As always, thank you for reading TFB! Be safe out there, have fun while shooting, and we will see you next time for the TFB Armorer’s Bench! Also, let us know what you think in the comments below! We always appreciate your feedback.
Staff Writer: TheFirearmBlog & AllOutdoor.com | Certified Gunsmith | Published Author | Firearm History Enthusiast
More by Sam.S


![[SHOT 2025] Magpul’s New Releases](https://cdn-fastly.thefirearmblog.com/media/2025/01/24/17441/shot-2025-magpuls-new-releases.jpg?size=350x220)

![[SHOT 2025] Sharps Bros Grip Modules for Springfield Echelon Pistols](https://cdn-fastly.thefirearmblog.com/media/2025/01/24/23301/shot-2025-sharps-bros-grip-modules-for-springfield-echelon-pistols.jpg?size=350x220)


Comments
Join the conversation
I've been using Ultrasonc cleaners for going on 45 years now.. time flies and is our most valuable resource.. Ive used them professionally and in my home shop. My current home shop cleaner is a popular made in China (aren't they ALL in this price range), sold on Amazon version that looks all stainless, starts with a V.. its a simply made device that you can service yourself either via manufacturers parts or any electronics mart..
Mine heats 30L of solution from room temp (the room was 42f when I last timed it) to >60c in 45 minutes. An ultrasonic cleaner is a machine you plan to use, not use like a battery operated cordless drill.
Solutions come in all types at all costs and it pays to notice the active ingredients at what part, and compare for value that way. I lot of my solution concentrate I make myself. I do use distilled water so the stainless lasts a much longer time.
Ultrasonic waves are like thousands of tiny scubbing hands all at once. I always marvel when watching a virgin solution first start cleaning a part I thought was mostly clean, like a watch or a pair of eyeglasses (or grandma's teeth), you'd be surprised how nice and shiny jewelry gets after being cleaned in this manner.. You see the solution turn dark around the part immediately after activating the transducers.. and soon the solution can't be seen through.. amazing how much dirt comes off.
You can also save solution by using plastic food jars (like a large Skippy's Super Chunk Peanut Butter jar) to put a solution in, then put the part, screw the lid on tight, and float it in the main body of solution.. which for floating you can use just distilled water Those scrubbing hands go right through the jar and get to work using whatever solution you put inside the jar. Heat goes right through as well. This way you can clean any type of part in any type of solution, and not ruin the main body of solution. Providing your part will fit in the jar.. some solution will escape unless you have very good jars, but still.. it s a great way to do small things. I do watches, glasses, brass cases, carb parts, nuts and bolts from whatever I'm currently working on, tools, you name it..
Using Hornady's solution I can clean a dozen handguns at a time after a class. One of my assistant range masters never fails to help so he can get his Glock cleaned this way, he says it comes out looking like new. Perhaps, and it will clean the dirt and most of the carbon if you get at it right away, but I think it cleans better if you disassemble the gun and not clean it whole. I've also cleaned 4 AR's at a time in mine.. these I'll take mostly apart.. and use compressed "dry without water" air to dry them off.. Hornady's and other gun solutions leave a nice oil based residue if used according to instructions that will keep your stuff from rusting.
If you have kids around the house.. let them know they're not for cleaning cats..
You can clean a cosmoline gun in your dish washer. I did an SKS about 20 years ago when they were $99 a piece. Just break it down as much as you can, no detergent needed just run it on a quick cycle with the hot water. Hose it down with Ballistol or some type of gun protectant and you're all good.